


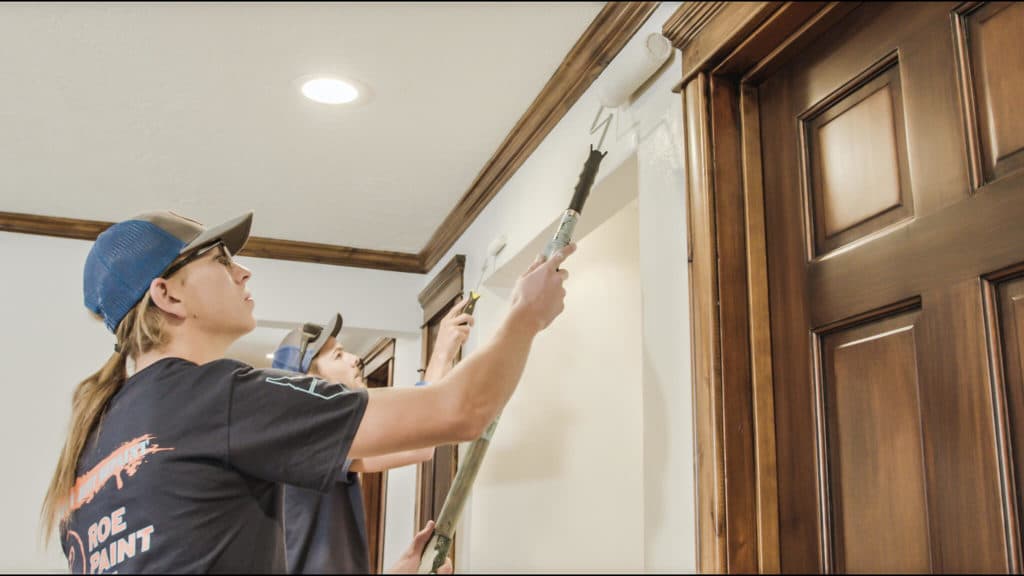
If your front door is faded, peeling, or just plain outdated, you might be wondering if a fresh coat of paint is enough to fix it or if it’s going to turn into one of those weekend projects you regret. Many homeowners want to paint their front door, but don’t know where to start, what tools they need, or how to avoid common mistakes.
At Roe Painting, we’ve been helping Idaho and Nevada homeowners find solutions to their painting problems and conundrums with helpful information and quality paint work for over 25 years.
In this step-by-step guide, you’ll learn how to paint a door properly (from prep to finish coat), so it looks great and holds up in any season.
Step One: Choose the Right Paint for Your Exterior Door
Your paint selection affects both the appearance and durability of the door. Not all paints are created equal, especially when it comes to exterior surfaces exposed to Idaho and Nevada weather. Here’s what to consider:
Best Paint Finishes for Exterior Doors:
- Semi-Gloss Paint: Durable, easy to clean, longer lasting. Most popular choice for exterior doors.
- High-Gloss Paint: Very durable and shiny, but shows surface flaws. Ideal for bold, modern looks if you prep well.
- Matte Paint: Rarely used outside. It’s cozy, but lacks durability and isn’t ideal for exposed doors.
Oil-Based vs. Water-Based Paint
- Oil-Based: Extremely durable, great for older wooden doors, but slow-drying and harder to clean up.
- Water-Based: Dries fast, easier to clean, more eco-friendly. Perfect for most modern exterior doors.

Step Two: Use the Right Primer for Exterior Doors
Primer helps your paint adhere better and last longer.
- Latex Primer: Best for use with latex painting; works well on modern doors
- Oil-Based Primer: Typically used when you are covering up an existing issue, like staining or tannin bleed from the wood
Most primers, whether water-based or oil-based, can be top-coated with either water-based or oil-based paint, but check the primer label to make sure your primer is compatible with your finish paint.
Step Three: Prep the Door for Painting
Proper prep is the difference between a clean finish and a peeling mess.
Here’s how to prep your door before painting:
Remove Hardware
Take off all doorknobs, locks, and fixtures. If you’re leaving the door in place, tape off hardware carefully with painter’s tape.
Clean the Surface
Wash with warm soapy water and let dry completely (24 hours recommended). Trapped moisture causes bubbling and premature failure.
Sand and Scrape
Use 120-grit sandpaper for light sanding. If there’s peeling paint, start with 80 grit and work up to 220 for a smooth finish.
Fill Imperfections
Use wood putty for cracks, holes, or divots. Let it dry, then sand smooth until you can’t feel any bumps or dips.
Tape and Protect
Lay down a drop cloth and tape off any areas you don’t want painted (like glass panels or trim). A clean line = a clean look.
Considering Doing This Yourself? Read This First.
Painting an exterior door seems simple until you’re on your second coat and the paint is bubbling.
If you're short on time, don’t have the right tools, or just want a professional-grade finish, this is a great project to hand off to a pro. A local team like Roe Painting can get it done quickly, cleanly, and with the right materials for long-lasting results.
Small projects like doors are great candidates for our Painter for a Day offer (8 hours of a professional painter at your disposal, or request a complimentary estimate for more detailed projects.

Step Four: Paint the Door (Here’s How)
Now for the fun part.
You can paint the door in place, but for the cleanest results, remove it and place it on sawhorses in a well-ventilated area.
Apply Primer
- Use a brush for corners, molding, and panels
- Use a mini foam roller for large, flat surfaces
- Let primer dry fully before painting
Apply Paint
- Choose a high-quality exterior paint in your desired finish
- Use a foam roller for a smooth, even coat
- Apply 2–3 thin coats instead of one thick one
- Follow dry times between coats (refer to label)
Let It Dry
Resist the urge to rush! Humidity and temp can slow drying, so always follow the manufacturer’s instructions.
Reattach Hardware
Once everything is dry, reinstall your door handle, lock, and hinges. If you removed the door, get help to rehang it safely.
Best Tools for Painting an Exterior Door
Want a clean finish? Use the right tools.
- Mini Foam Roller (4”): Best for smooth coats on flat surfaces
- Angled Paintbrush: Perfect for detail work and edges
- Painter’s Tape: Keeps lines clean and protects hardware
- Drop Cloth: Catches drips and protects flooring
- Sandpaper (80, 120, 220 grit): For smoothing and prep
- Putty Knife + Wood Filler: Fills cracks and imperfections
- Screwdriver: For removing and replacing hardware
Tips for a Smooth, Professional Finish
Use Long, Smooth Strokes
Follow the direction of the wood grain for a cleaner look.
Avoid Brush Marks
Use a foam roller for flat areas and blend brush strokes carefully.
Apply Multiple Thin Coats
Build coverage slowly. Don’t glob it on.
Wait for Each Coat to Dry
Check the label for dry time between coats (usually 24 hours).
FAQs: How to Paint an Exterior Door
What is the best primer for an exterior door?
If you're using latex paint, go with a latex primer. For oil-based paint, use an oil-based primer. Match the primer to your paint type for the best adhesion and durability.
What's the best paint roller for an exterior door?
A 4-inch high-density foam roller is ideal. It gives a smooth finish and helps prevent brush marks.
Can I paint a door without sanding it?
You can, but it’s not recommended. Light sanding improves adhesion and helps smooth the surface. For best results, don’t skip this step.
How to Paint a Door Like a Pro (And When to Call One)
Now you know how to paint a door—step by step—and what tools and materials will give you the best results. Whether you’re fighting chipped paint, weather exposure, or just want to refresh your curb appeal, painting your front door is a high-impact, low-cost upgrade.
If you’re not sure whether to DIY or hire it out, start by talking to a pro. A quick consult can save you hours of frustration (and rework). If you're ready to dive into paint types, read whether or not premium paint is worth the cost.
At Roe Painting, we help Boise and Elko homeowners protect and refresh their homes with high-quality exterior painting services. Whether you need your entire home painted or just want a freshly painted front door, we’re here to help.
Topics:

.jpg?width=750&height=1000&name=image001%20(1).jpg)

